Integrations
On Atmosly, at present, you can perform the following integrations successfully:
➤ AWS
➤ GitHub
➤ BitBucket
➤ GitLab
➤ DockerHub
➤ ECR
➤ Cloudflare

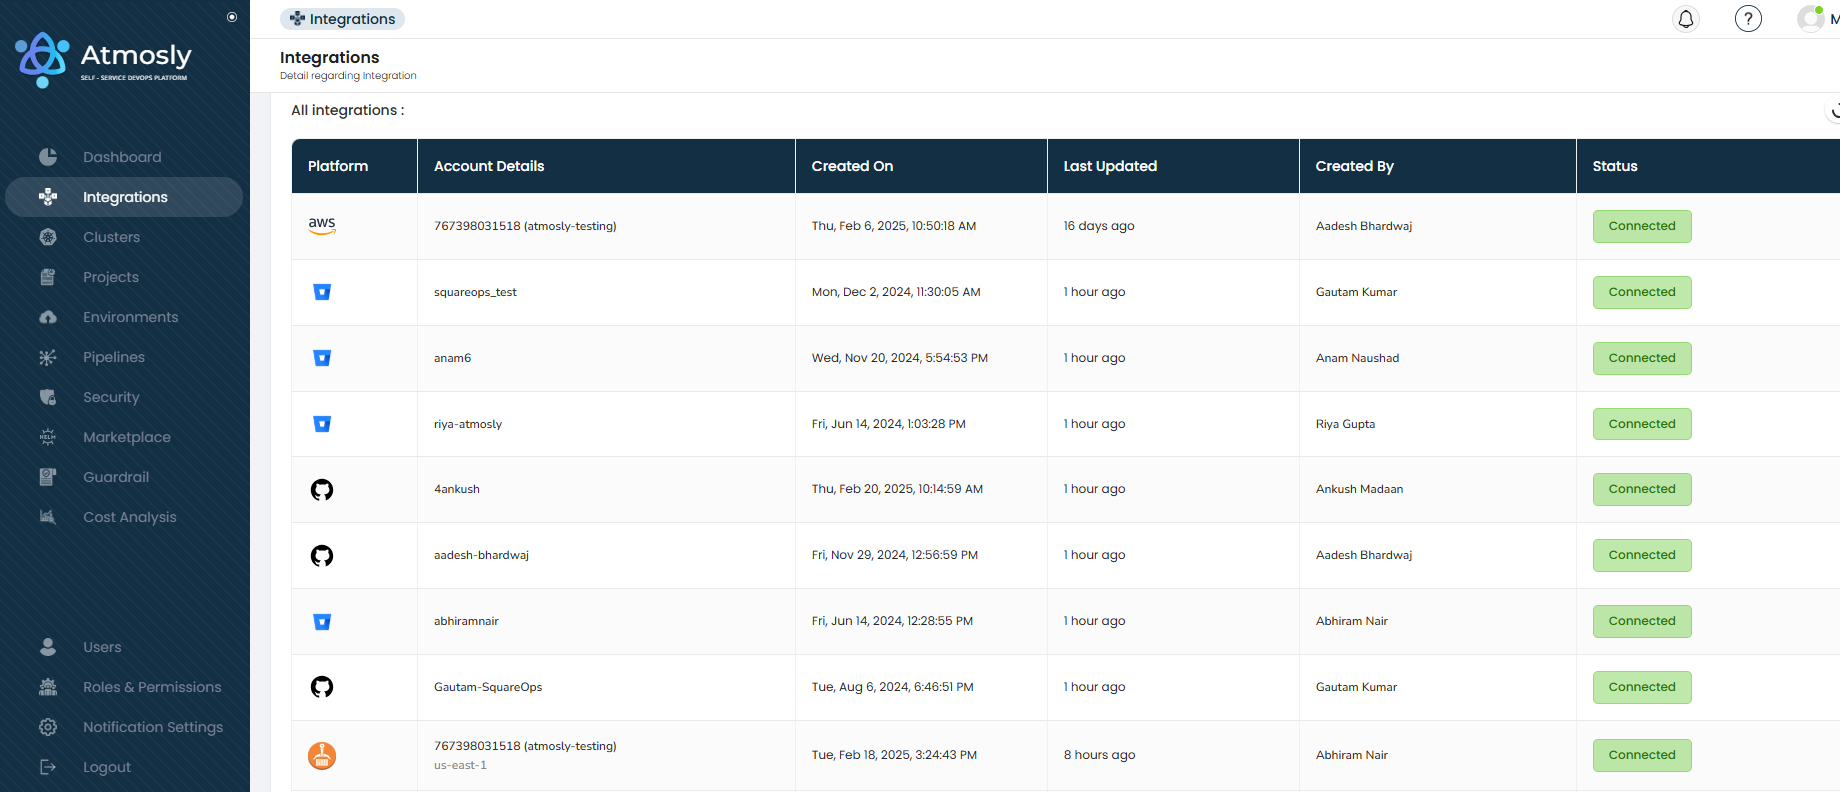
You can also view the history of integrations on the platform, and monitor the status of the same!
AWS Integration
Please note to sign in to AWS before performing this action.
To connect to AWS to Atmosly, follow the steps mentioned below -
-
Click on 'Connect' for AWS
-
A new screen would open:
a. If you are not logged into AWS, you will have to login to AWS first.
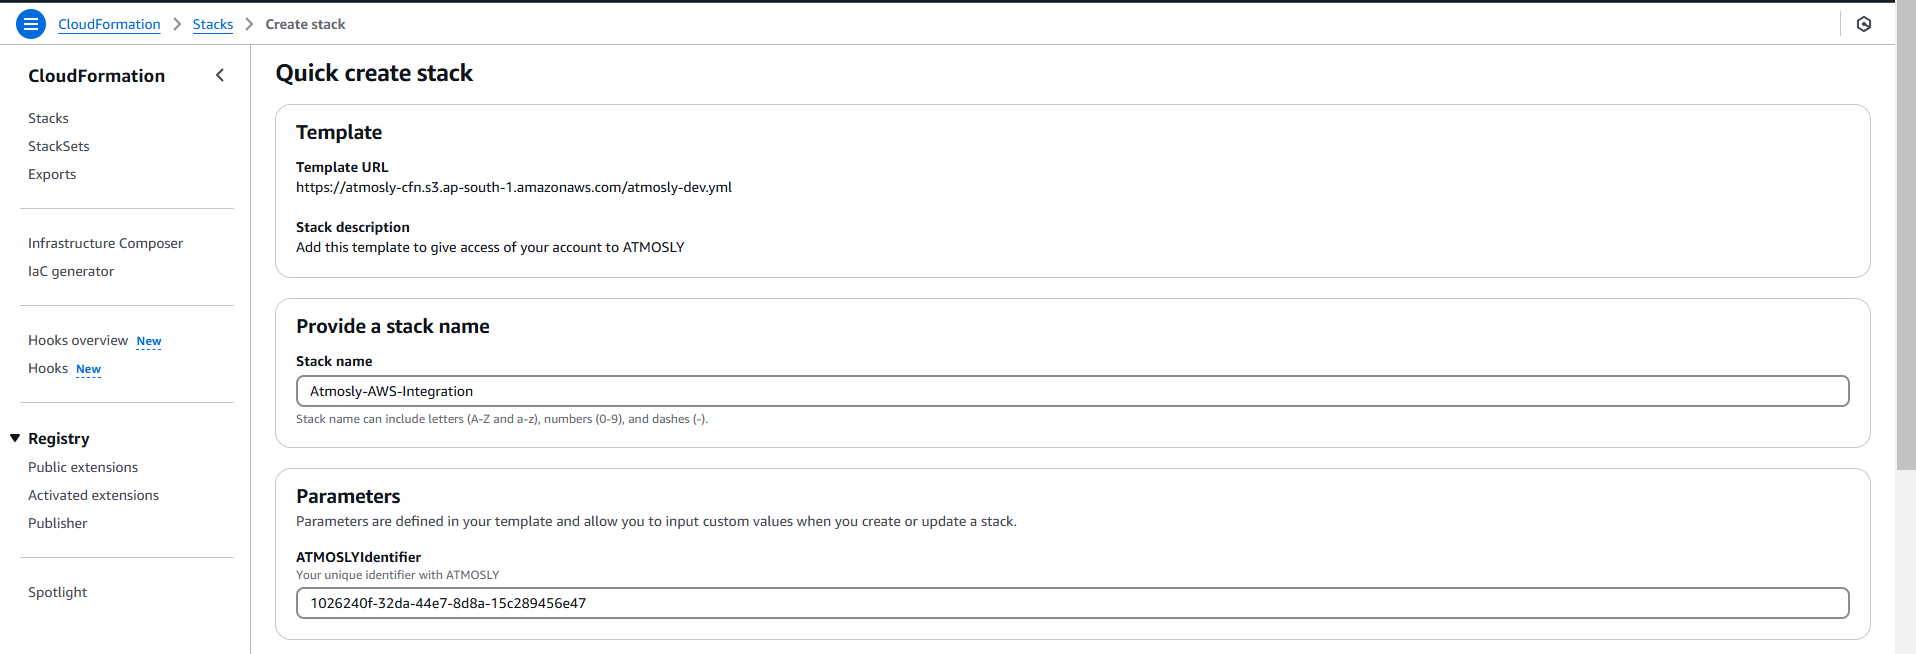
b. If you are signed in, you will see a screen to 'Create Stack'.

- Once on Create Stack screen and confirm the details.
PLEASE NOTE: For Atmosly to create infrastructure and deploy applications, assumes an IAM role with admin permissions.

- Click on 'Create Stack', once created, you will see the integrated account on Atmosly.
GitHub
Please note to sign in to GitHub before performing this action.
To connect to GitHub to Atmosly, follow the steps mentioned below -
-
Click on 'Connect' for GitHub.
-
A new screen would open:
a. If you are not logged into GitHub, you will have to login to GitHub first.
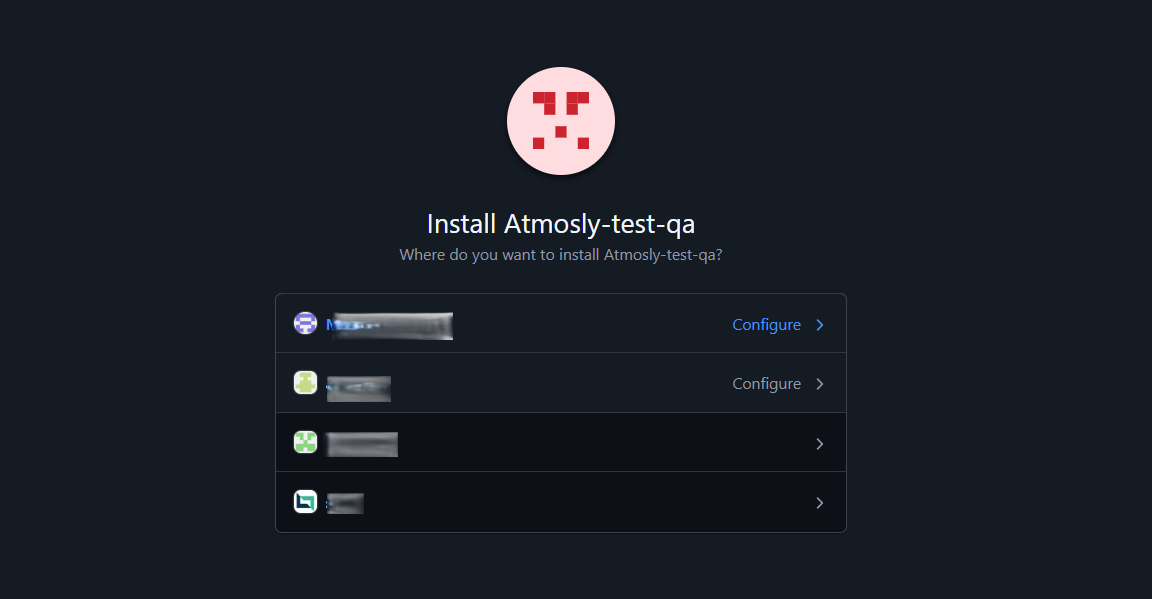
b. If you are signed in, you will see a screen to Install Atmosly app in an organisation.

- Install the application on your organisation's GitHub.
- Click on 'Install & Authorize'
- Once installed, you will see the integrated account on Atmosly.
BitBucket
Please note to sign in to BitBucket before performing this action.
To connect to BitBucket, simply click on 'Connect' for BitBucket. If you are signed in to BitBucket, you will see the integrated account on BitBucket. If not, you will have to sign in to BitBucket and once signed in, you will see the account integrated on Atmosly.
PLEASE NOTE: You need to be added to a workspace (created for your organisation) by a workspace administrator for a successful integartion to Atmosly.
GitLab
Please note to sign in to GitLab before performing this action.
For GitLab integration, with Atmosly, you can connect your Cloud account or your hosted account.
To connect your cloud account -
- Click on 'Connect' for GitLab.
- In the right drawer, select GitLab Cloud from 'Source' dropdown.
- If you are signed in to GitLab, you will see the integrated account on Atmosly. However, if you are not signed in, you will be asked to sign in first post which you will be able to see integration on Atmosly.
To connect your hosted account -
- Click on 'Connect' for GitLab.
- In the right drawer, select GitLab self-hosted from 'Source' dropdown.
- Enter 'Base URL' and 'Personal Access Token' for your self hosted account.
How to get baseurl and PAT for your self hosted account on GitLab
-
Base URL:
a. Open GitLab in your web browser (on your device, computer or laptop).
b. Copy the address from your browser's address bar. -
PAT:
a. On your GitLab account, on the left sidebar, select your profile.
b. Select Edit profile.
c. On the left sidebar, select Access tokens.
d. Select Add new token.
e. Enter a name and expiry date for the token.
f. Select the desired scopes.
g. Select Create personal access token.Navigate to https://docs.gitlab.com/ee/user/profile/personal_access_tokens.html to get more information on how to create PATs on GitLab.
DockerHub

Please note to sign in to DockerHub before performing this action.
For DockerHub integration, with Atmosly :
-
Click on 'Connect' for DockerHub.
-
Right drawer would open.
-
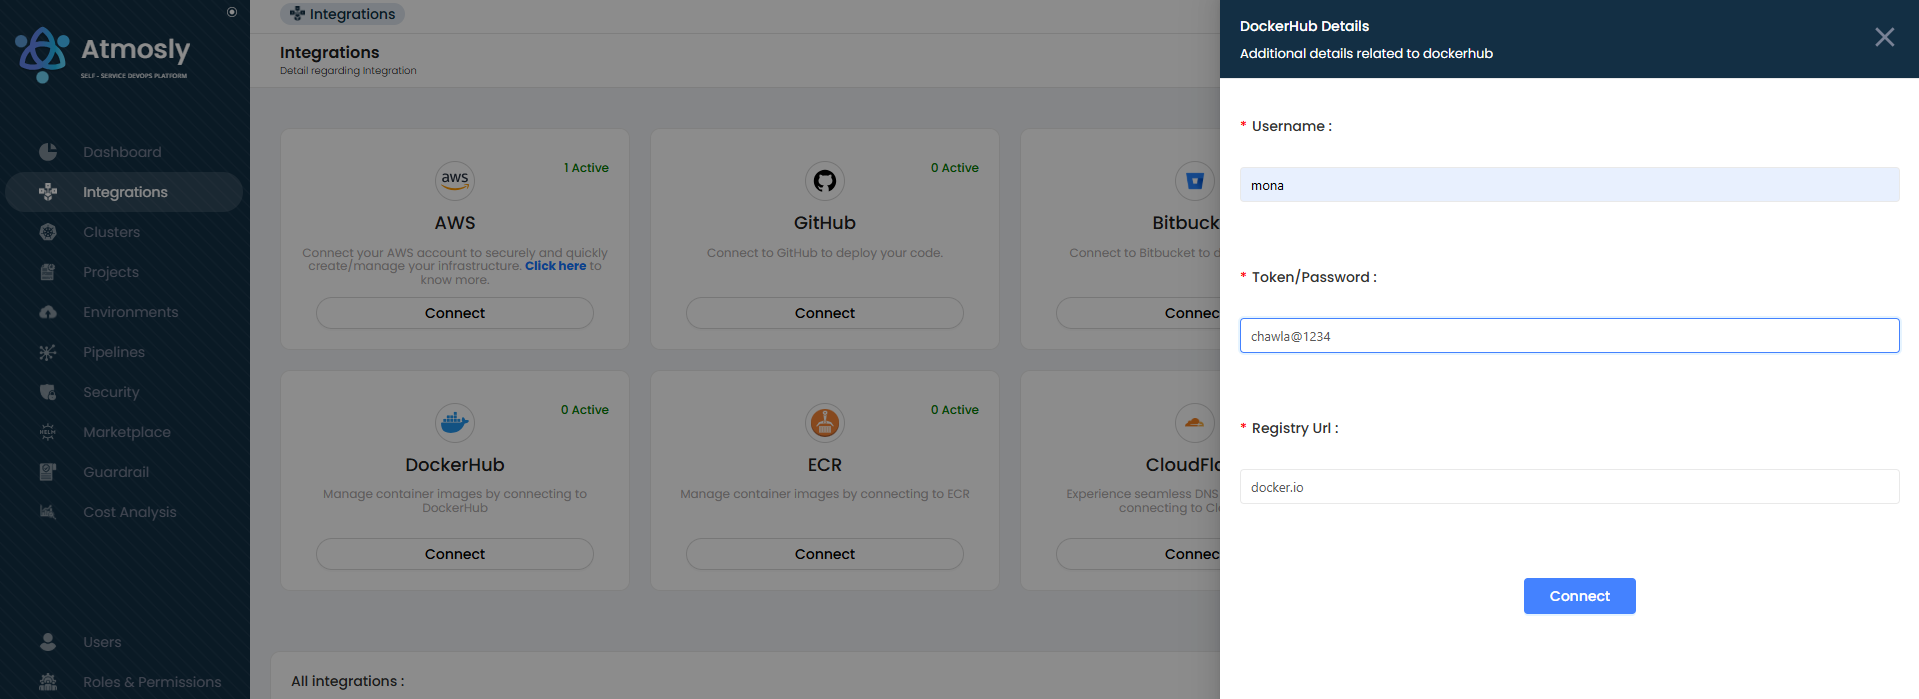
Add details of the integration:
a. Username : Enter your dockerhub username.
b. Password/Token : Provide your DockerHub password or authentication token.
c. Registry Url : Specify the DockerHub registry URL.
ECR

To connect to GitHub to Atmosly, follow the steps mentioned below -
-
Click on 'Connect' for ECR.
-
Right drawer would open.
-
Add details of the integraiton:
a. Account ID: This will be prepopulated if you an AWS account integrated.
b. Select the AWS region where your ECR is hosted from the drop-down list. -
Click on 'Connect'.
-
Once connected, you will see the integrated ECR on Atmosly.
Cloudflare
To connect to Cloudflare to Atmosly, click on 'Connect' for Cloudflare and follow the instructions in the right drawer to obtains the API Token for a successful connection.
You can view all the integrations below :
